How to Operate a Mini Excavator: A Comprehensive Tutorial- Hydraulic Pulverizer
Keywords: mini excavator auger attachment, excavator auger attachment

Mini excavators have become an essential piece of construction equipment. Used across various construction, landscaping, and utility projects, their compact size and versatility make them a go-to choice for both professionals and DIY enthusiasts.
However, it’s important to become familiar with a mini excavator before operating. This includes understanding what to do before operation, their basic controls, how to use and detach a bucket, and most importantly, how to safely operate the machine.
Fortunately, mini excavators are one of the safest and easiest machines to learn. This beginner’s guide to mini excavators, along with our YouTube video “How To Operate a Mini Excavator”, will explain what goes into operating these powerful machines.
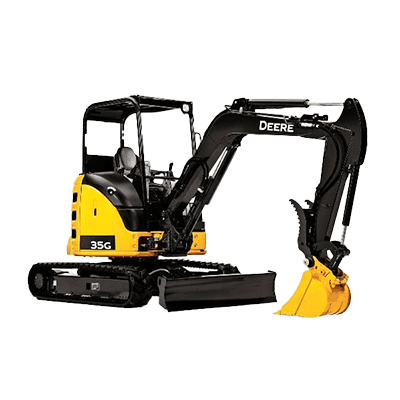
Getting Acquainted with Your Mini ExcavatorMini excavators, also called compact excavators, come in a wide variety of brands and models and can be equipped with different attachments tailored to specific project requirements. They may also have various capabilities depending on the mini excavator’s specs.While all mini excavators have similar uses, each model will have a slightly different cab and control layout. It’s a best practice to read the operator’s manual and capacity charts and familiarize yourself with the machine’s levers, pedals, and joysticks before getting to work.
Pre-Operational Safety and Inspection Checks
Safety is non-negotiable when operating heavy machinery. Before starting the engine, conduct a thorough pre-use inspection. During this circle check of a mini excavator, you must examine the tracks for wear or damage, check fluid levels, and ensure attachments are securely fastened.
When checking the tracks, you want to ensure there are no excessive or defiant cracks in the tracks. You also want to make sure the tracks are tight enough to the machine so they don’t walk off the equipment. For this, you’ll want to refer back to the owner’s manual to check for the ideal tightness of the tracks. Tracks are tightened through a grease fitting or socket set depending on the machine.
Once you’ve checked the tracks, it’s good to check on the fluid levels and filters of the machine. With fluid, there is the coolant level, oil, and fuel. For the filters, there are the fuel filter, oil filter, water/fuel separator, and hydraulic connections. When checking the filters, make sure there are no leaks and drain the water separator when full.
Keeping fluid levels full and checking filters and hydraulic connections for leaks before using the machine will reduce the wear and tear on the machine. Equally important is to wear the proper personal protective equipment (PPE) like hard hats, gloves, steel-toed boots, and eye protection when operating.
Step-by-Step Guide to Operating a Mini Excavator
Now that you’ve done your pre-operation checks, it’s time to get in the machine and get familiar with the controls.
Starting the Engine and Basic Maneuvers
To start, get into the cab using three points of contact and ensure you’re in a clear area. When you’re in the machine and looking to understand the controls, you must be facing the side with the blade. This is the “front” side of a mini excavator. The cab swivels a full 360 degrees, but the controls are based on the side with the blade.
Now that we’ve got that orientation covered, it’s time to discuss some mini excavator operating tips. Overall there are five joysticks to be aware of when operating a mini excavator. There are two drive sticks in front of the operator’s chair, one to the left, and two to the right.
To go forward, push both front sticks forward. To go backward, pull them both back. To turn the entire machine to the right, push the right stick forward and the left stick back, and vice versa to turn left. If you want to rotate just the cab, use the left joystick and push it either left or right.
For many mini excavators, there is also a right foot petal that controls the swivel of the boom arm. Stepping on the left side will rotate the stick to the left and the right side will move it to the right. On the same left joystick that is used to rotate the cab, it can be pushed forward or pulled back to move the stick arm down or up.
There is one smaller joystick on the right which is used to control the actual bucket and attachment. When pulled to the left, the bucket will curl in and close and when pushed to the right, the bucket will curl away and open. When pushed to the front, the boom arm will go down to the ground and when pulled back it will be raised.
The second, larger joystick on the right of the machine is used to control the leveling blade. Pressing it forward will lower the blade into the ground while pulling it back will raise the blade.
It’s important to note that these are the controls when the machine is operating in ISO. If the machine was operating in SAE, the joystick controls would be switched from left and right. To change the operating system of the machine, the mini excavator must be turned off. Placement for the control switch is different in every machine so make sure to check the owner’s manual on how to do it properly.
Before actually moving across a new site, it’s important to familiarize yourself with the basic movements. Fortunately, you can do many of these swinging and arm movements while idling.
Typically, efficient digging, trenching, and excavation require years of experience. Unfortunately, you’re not going to become a mini excavator operator pro in just a weekend. As a new operator, it’s important to use gradual movements while getting familiar.
However, when digging and excavating, there are some best practices to use. These include:
- Ensuring that there are no underground utilities in the area you are working in.
- Using the right size of mini excavator for the job that you are doing. If you’re working in an area with a lot of rock, you might want a stronger mini excavator. At the same time, if you know the area you’re working in, it might require a longer boom stick to reach the area safely.
- Keeping the leveling blade on the ground when digging. It can often give you increased stability and strength while also keeping the machine level.
- Remember that you don’t need to always move the entire machine for every lift. Sometimes a simple cab rotation, blade lowering, or boom swivel can be the right adjustment.
Loading and Dumping Materials
Along with digging, mini excavators can be used to load materials into dump trucks. This will require mostly the boom arm with the curl-in and curl-out functions. Best practices for loading and dumping with a mini excavator include:
- Being aware of where you’re loading and dumping materials. Depending on the project you may be using a dumpster, dump truck, or articulating dump truck. Each of these has different height requirements which will determine the size and reach of the mini excavator.
- Understanding the type of material you are working with. If you’re doing a demolition job, you may want a stronger mini excavator that can lift heavier materials like brick and concrete. Landscaping jobs that just require moving dirt may not require as strong of a mini excavator.
Many other advanced techniques for digging and dumping require some experience. However, these techniques are best learned on the job. Remember, patience and precision yield better results than speed.
Tips for Efficient and Safe Mini Excavator Operation
The first tip for mini excavator safety is to always wear your seatbelt and be aware of your surroundings. Even on small residential landscaping projects, there is the potential for hazards. As an equipment operator, you should always familiarize yourself with the space you’ll be working. This includes knowing where obstructions are, how many people are going to be working there, and how much space the mini excavator has to operate.
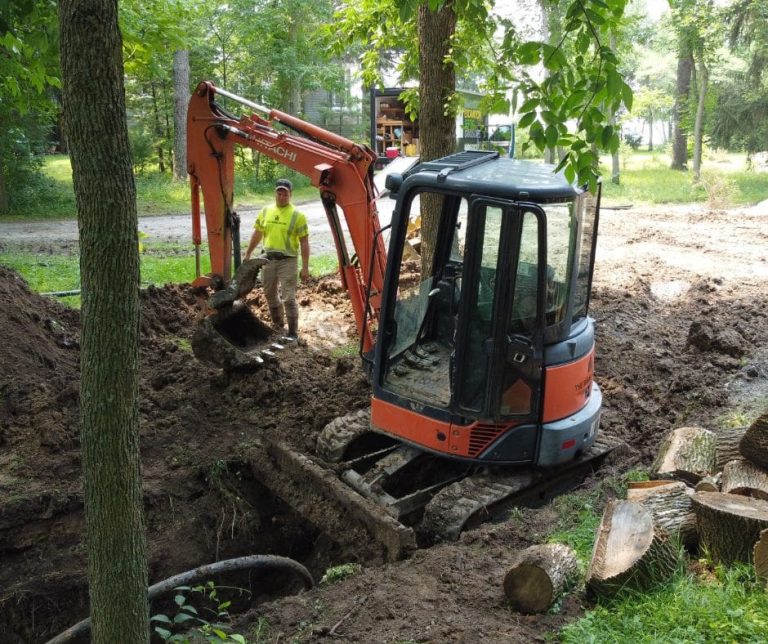
Other safety tips may depend on whether you’re in a closed cab or open cab unit. Closed cab units have more blind spots but open cab units, like the one in the video, can be impacted by debris or kickback. The type of cab will also impact how much rollover protection you have. For example, a closed cab has a sturdier frame while it could be possible to fall out of an open cab mini excavator.
There is always a risk of accidents happening, as is the nature of working with heavy equipment. However, by taking safety precautions like being aware of your surroundings, only operating once you’re familiar with the machine, and using best safety practices, you are more like to be efficient and safe.
Navigating Challenging Terrains and Tight Spaces
Operating in difficult conditions demands adaptability. Understand the machine’s limitations and employ strategies for handling uneven terrain or confined spaces. Exercise caution and use additional support if needed.
Compact excavators are designed for tight, small spaces but that doesn’t mean it’s always easy. It takes conscious thought to control a mini excavator in small areas without damaging the machine or its surroundings.
Post-Operation Procedures and Maintenance
Once your work is done, follow proper shutdown procedures. Conduct routine maintenance tasks like greasing and cleanup to ensure the mini excavator’s longevity. This can also include doing a circle check, similar to the one before starting the machine.
Conclusion
Operating powerful machines like a mini excavator demands your full concentration. By understanding the machine, adhering to safety protocols, and practicing responsible operation, beginners can confidently tackle projects. Remember, ongoing training and access to quality equipment are key.
Looking to rent a mini excavator for your next project? Check out the DOZR Marketplace for mini excavator rentals of all sizes. Also, take a look at our blog for more mini-excavator content to help refine your skills and knowledge.
